Wedding Shrine -- from start to finish in pictures part 2
As usual, Blogger is not cooperating in loading pictures. I seem to have reached my limit. I will try to create a separate post showing the very start of this project. These are the photos of the finished stages.
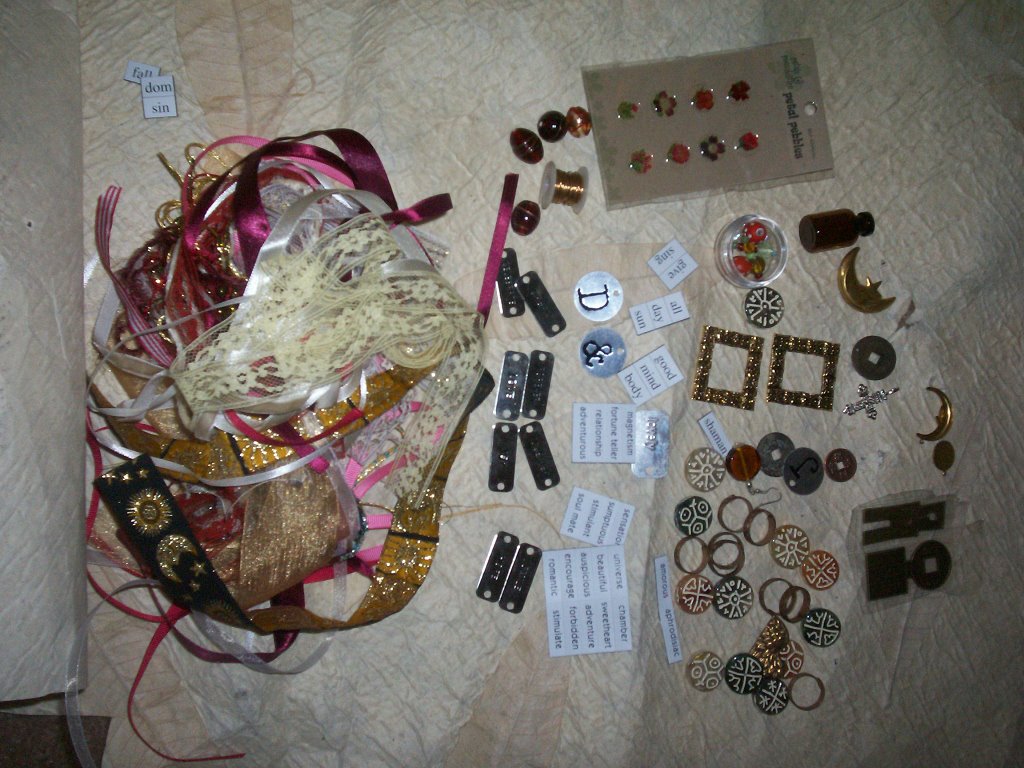
I selected the embellishments, below, for my clients, in keeping with the wedding theme. These will be applied by the couple and their guests at the wedding celebration. There are 20-30 lengths of various fibers and ribbons to coordinate with the colors, some pressed flowers in self-stick dimensional resin, large blown glass beads in shades of red and gold and gold wire to attach them for drawer pulls and door knobs, metal tags with the couple's initials, and with words like "celebrate", "dream", "joy", poetry magnet words suited to love and romance, ceramic tiles, a small bottle, more beads, charms with the moon and stars, two small metal frames, chinese coins and metal charms, brass rings which can be tied to the ribbons. The couple can add personal objects with special meaning to these embellishments. I enclosed a package of Glue Dots for easy application. Here are about 30-40 small eye bolts I spray painted gold. They will be put on the back of the piece in whatever arrangement my clients wish, and then the ribbon and fibers can be threaded through them and tied on.
 I collected many Asian and Indian images of couples, gods and goddesses, and fertility symbols and altered them in Photoshop and created collages. This is one such page.
 Then I tore them into individual pieces or small groupings and ran them through a Xyron machine, which applies adhesive to the back and places them on paper, so they are easy to peel and stick - resulting in collage by the group effort.
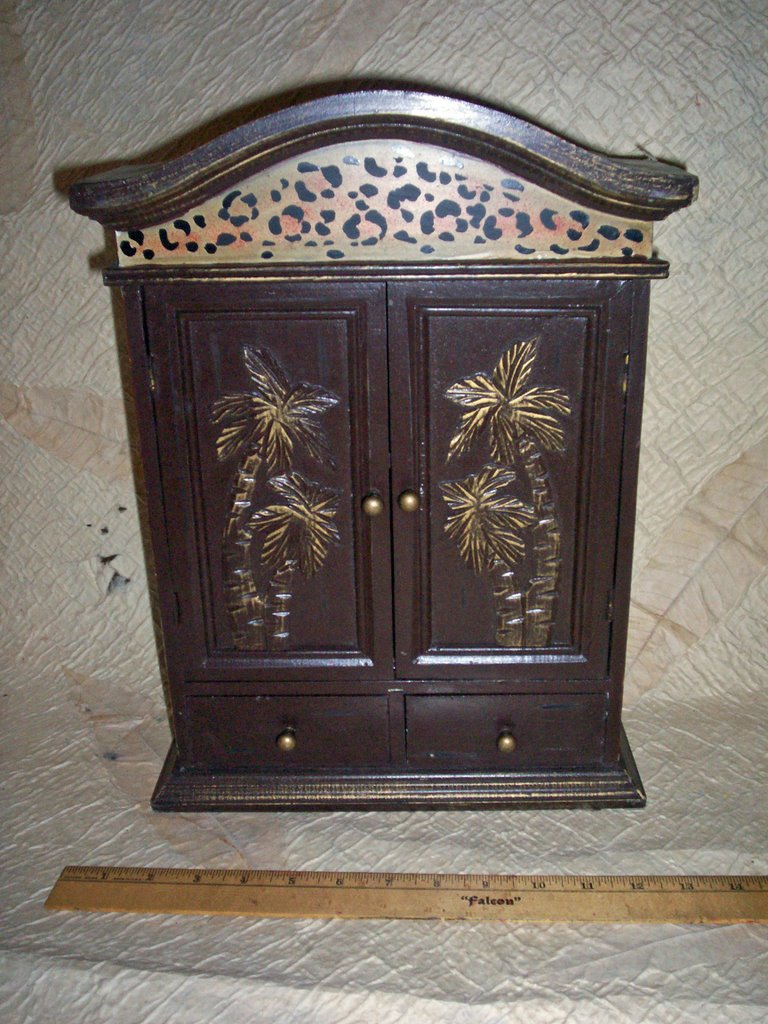
 Here is the front of the shrine, ready for further embellishment. I layed down layers of gesso, various shades of red and pink, transparent glazes in red and gold, and gold leaf detail on edges and to bring out the palm tree carvings.
 Here is the side of the shrine. Each side was painted, freehand and with foam stamps, to replicate the background of the wedding invitation, with gold leaf on the outlines of some of the elements.
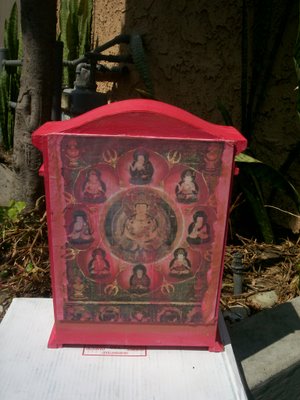
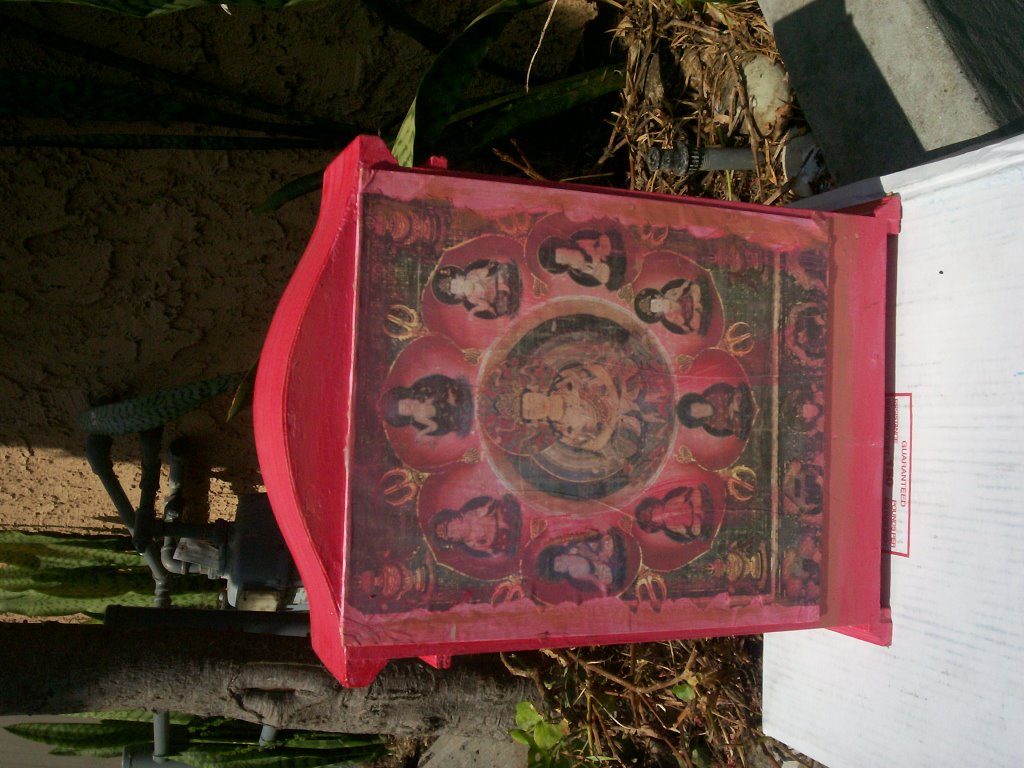
 This is an old temple image of the Buddha on the back of the shrine, altered with paint and gold leaf, and with additional Buddha images added in a circular collage. The eye bolts for the ribbons will go here, if and where the couple desires.
 Here is the interior of the shrine, with an image of an Indian god and goddess couple flying on the back of the bird god Garuda, placed over an abstract acrylic base, and further altered with watercolor, pen, and whatever else I could think of. More of the collage images can go around the image, on the sides and shelf, and inside the drawers.

I can't wait to see how this ends up -- it will be a treasured keepsake of their celebration, made with loving hands.
I selected the embellishments, below, for my clients, in keeping with the wedding theme. These will be applied by the couple and their guests at the wedding celebration. There are 20-30 lengths of various fibers and ribbons to coordinate with the colors, some pressed flowers in self-stick dimensional resin, large blown glass beads in shades of red and gold and gold wire to attach them for drawer pulls and door knobs, metal tags with the couple's initials, and with words like "celebrate", "dream", "joy", poetry magnet words suited to love and romance, ceramic tiles, a small bottle, more beads, charms with the moon and stars, two small metal frames, chinese coins and metal charms, brass rings which can be tied to the ribbons. The couple can add personal objects with special meaning to these embellishments. I enclosed a package of Glue Dots for easy application.
 Here are about 30-40 small eye bolts I spray painted gold. They will be put on the back of the piece in whatever arrangement my clients wish, and then the ribbon and fibers can be threaded through them and tied on.
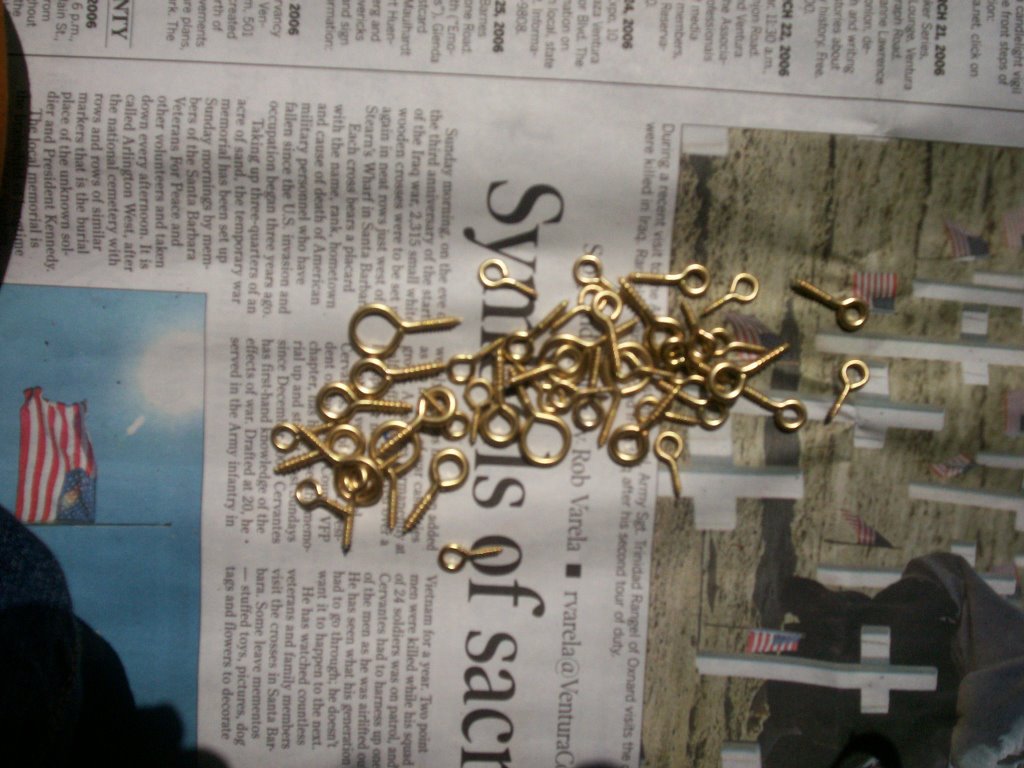 I collected many Asian and Indian images of couples, gods and goddesses, and fertility symbols and altered them in Photoshop and created collages. This is one such page.
 Then I tore them into individual pieces or small groupings and ran them through a Xyron machine, which applies adhesive to the back and places them on paper, so they are easy to peel and stick - resulting in collage by the group effort.
 Here is the front of the shrine, ready for further embellishment. I layed down layers of gesso, various shades of red and pink, transparent glazes in red and gold, and gold leaf detail on edges and to bring out the palm tree carvings.
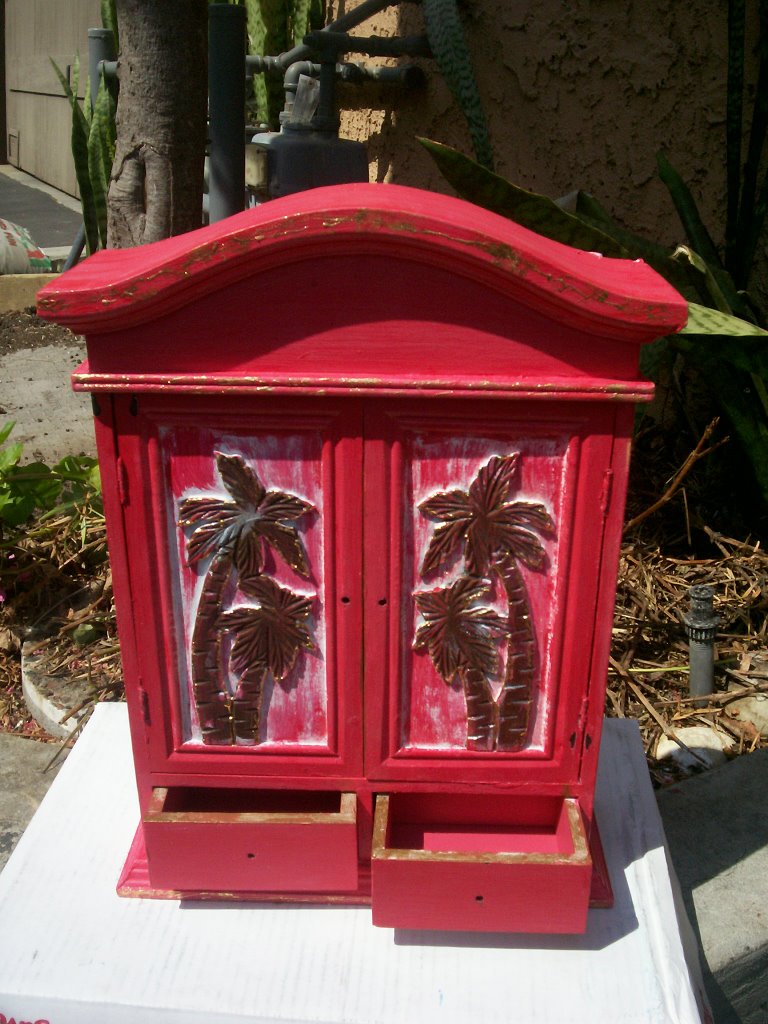 Here is the side of the shrine. Each side was painted, freehand and with foam stamps, to replicate the background of the wedding invitation, with gold leaf on the outlines of some of the elements.
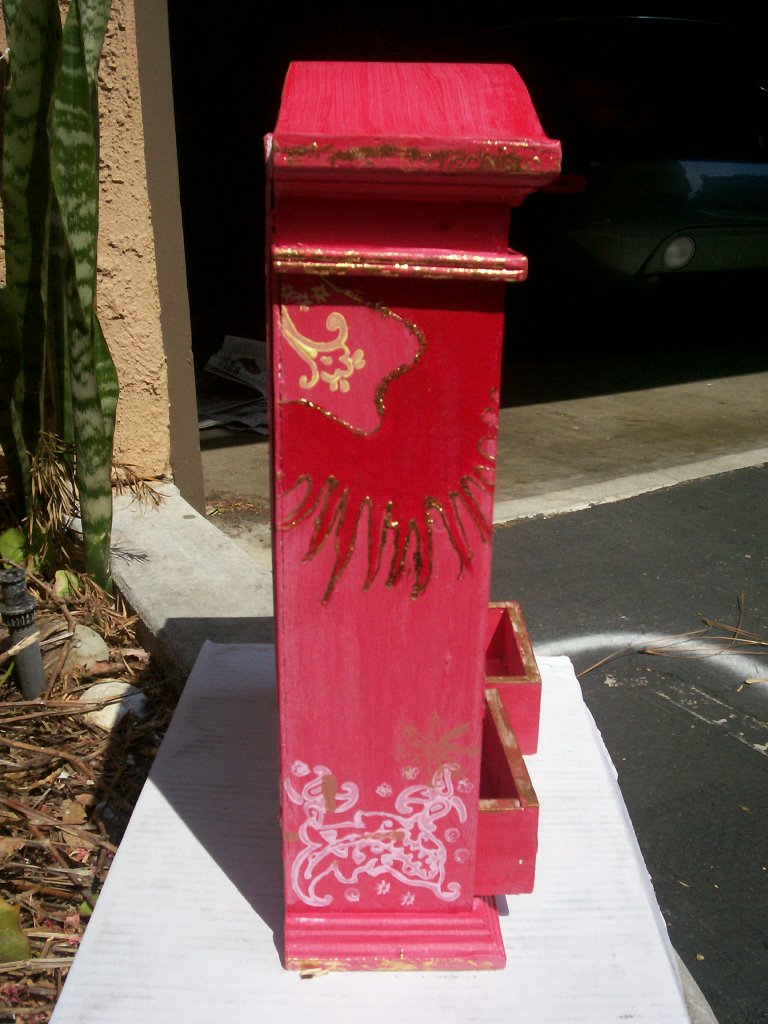 This is an old temple image of the Buddha on the back of the shrine, altered with paint and gold leaf, and with additional Buddha images added in a circular collage. The eye bolts for the ribbons will go here, if and where the couple desires.
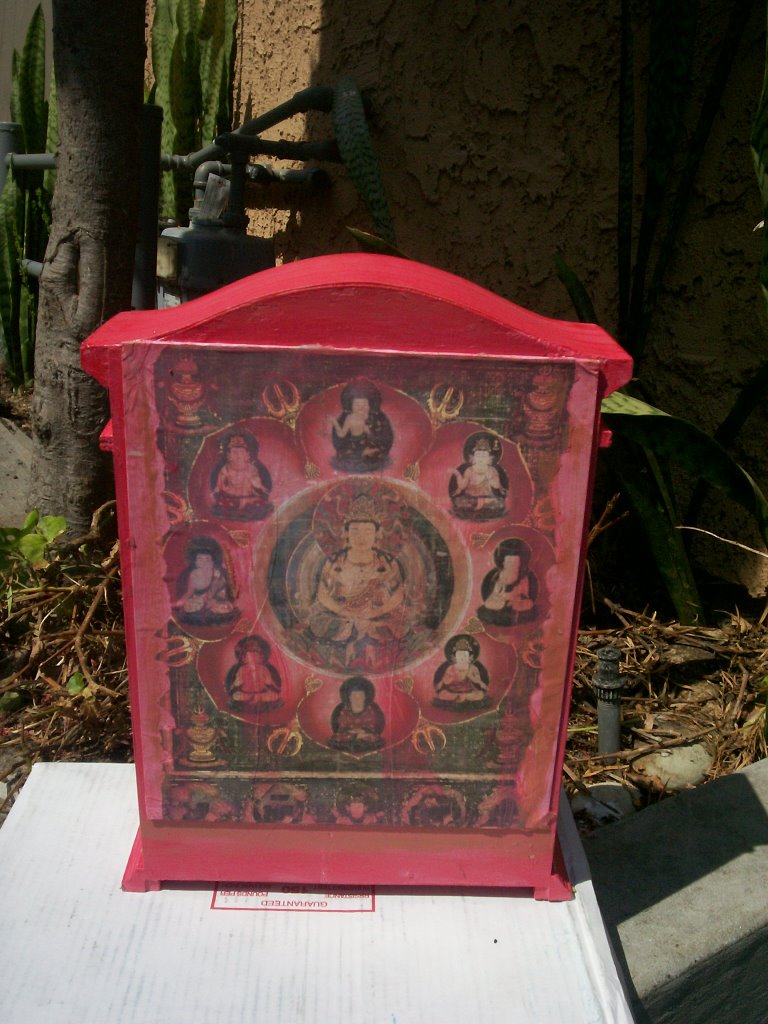 Here is the interior of the shrine, with an image of an Indian god and goddess couple flying on the back of the bird god Garuda, placed over an abstract acrylic base, and further altered with watercolor, pen, and whatever else I could think of. More of the collage images can go around the image, on the sides and shelf, and inside the drawers.
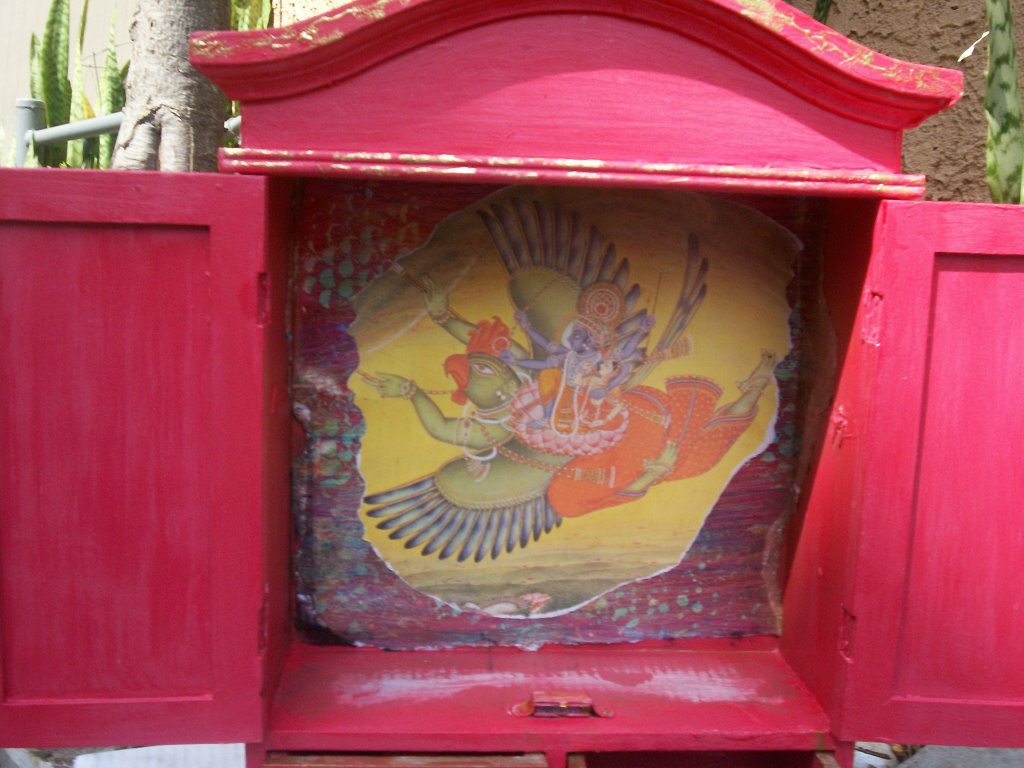
I can't wait to see how this ends up -- it will be a treasured keepsake of their celebration, made with loving hands.
posted by Lisa at Fragile Industries Studios at 9:32 AM
![]()
![]()


2 Comments:
That is really COOL!!!!!!!!! enjoyed seeing the progress pictures and description.
Wow. I love it!
Post a Comment
<< Home